How To Replace Heating Element In Dishwasher: A Step-by-Step Guide For Every Homeowner
So, you’ve noticed that your dishwasher isn’t drying your dishes like it used to. Maybe the dishes are coming out wet, or you’re seeing some weird error codes flashing on the control panel. Chances are, your heating element is on its way out. Don’t panic—replacing a heating element in a dishwasher isn’t as scary as it sounds, and we’re here to walk you through it step by step.
Replacing the heating element in your dishwasher can save you a ton of money compared to calling in a repair guy. Plus, it’s a great way to learn more about how your appliances work. If you’ve been putting off this task because you’re not sure where to start, don’t worry. We’ve got your back with this easy-to-follow guide.
By the end of this article, you’ll have the confidence to tackle this repair like a pro. And hey, who knows? You might even enjoy the process. Let’s dive right in, shall we?
Here’s a quick table of contents to help you navigate:
- Introduction
- Understanding the Heating Element
- Tools You’ll Need
- Safety First
- Disassembling Your Dishwasher
- Removing the Old Heating Element
- Installing the New Heating Element
- Testing Your Dishwasher
- Troubleshooting Tips
- Common Questions
Understanding the Heating Element
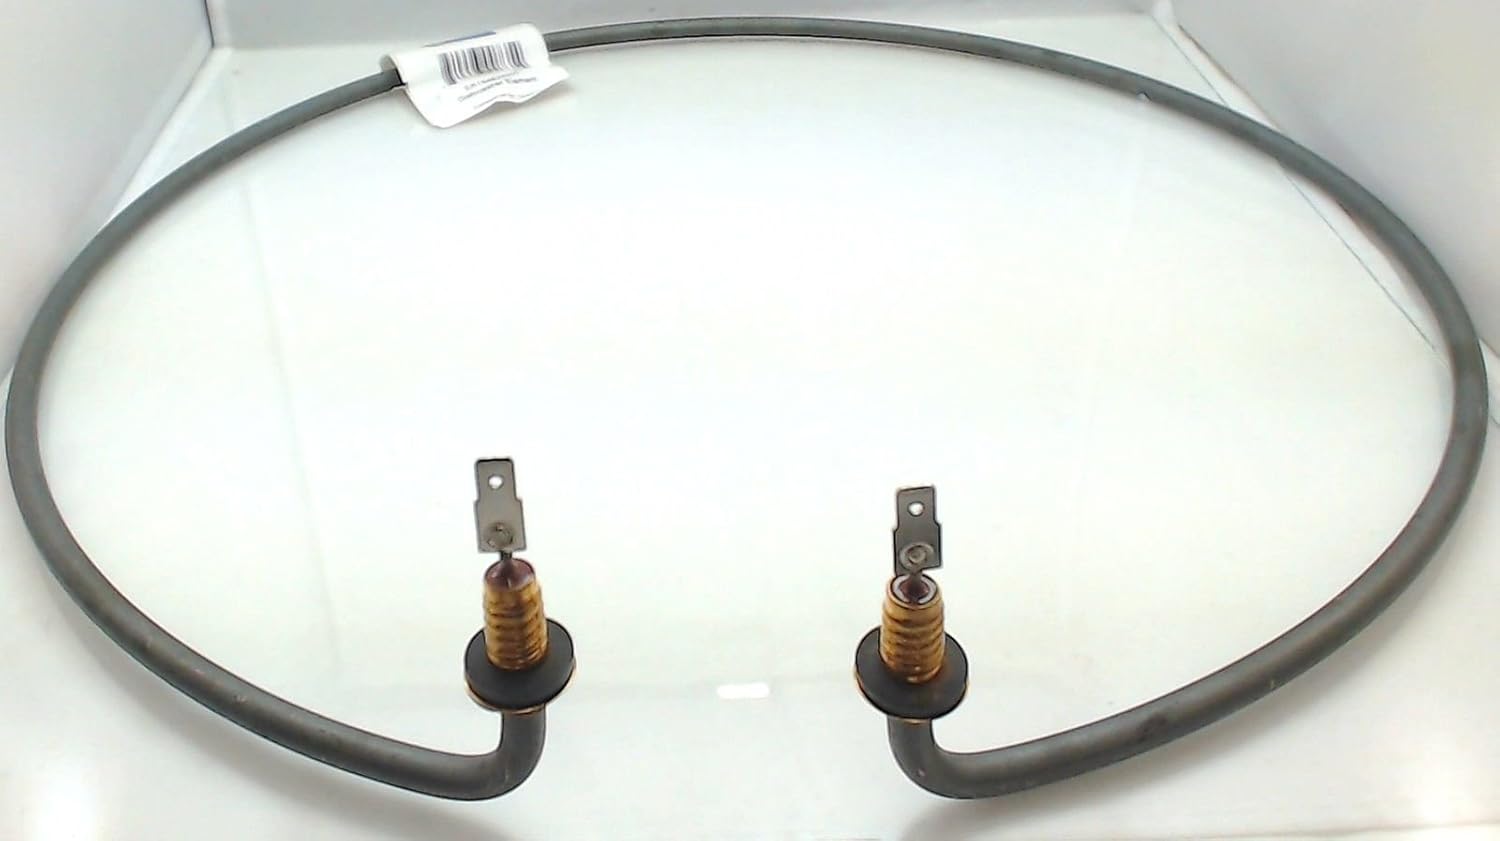
The heating element in your dishwasher plays a crucial role in drying your dishes. It’s essentially a metal tube that heats up when electricity passes through it, providing the warmth needed to evaporate water droplets from your plates and utensils. When this part fails, your dishwasher might still clean your dishes, but they’ll come out wet and unpleasant to handle.
Signs that your heating element might be on its last legs include dishes that don’t dry properly, error codes related to heating issues, or even visible damage to the element itself. Replacing it is often the best solution, especially if you’ve ruled out other potential problems like a clogged drain or faulty thermostat.
Why Does the Heating Element Fail?
There are several reasons why a heating element might stop working:
- Corrosion: Over time, the element can develop rust or mineral buildup, which can cause it to fail.
- Wear and Tear: Like any part, heating elements have a lifespan and can simply wear out after years of use.
- Electrical Issues: A blown fuse or faulty wiring can also prevent the element from functioning properly.
Now that you know what you’re dealing with, let’s talk about how to fix it.
Tools You’ll Need
Before you start tinkering with your dishwasher, it’s important to gather the right tools. Here’s a list of everything you’ll need:
- Screwdriver (Phillips and flathead)
- Socket wrench set
- Needle-nose pliers
- Wire cutters or strippers
- Replacement heating element (make sure it’s compatible with your model)
- Rubber gloves (optional but recommended)
Pro tip: Check your dishwasher’s manual or model number to ensure you get the correct replacement part. Most heating elements are universal, but it’s always better to double-check.
Safety First
Working with electrical appliances can be dangerous if you’re not careful. Here are some safety tips to keep in mind:
- Turn off the power to your dishwasher at the circuit breaker before starting any work. This is non-negotiable!
- Unplug the dishwasher from the wall outlet for added safety.
- Wear rubber gloves if you’re handling any electrical components.
- Make sure the dishwasher is completely cooled down before you begin.
Remember, safety should always come first. If you’re ever unsure about a step, don’t hesitate to consult a professional.
Disassembling Your Dishwasher
Now that you’re ready to roll, it’s time to take apart your dishwasher. Don’t worry—it’s easier than it sounds. Follow these steps:
First, remove the toe kick panel at the bottom of the dishwasher. This is usually held in place by a few screws. Once the panel is off, you’ll have access to the wiring and heating element.
Next, locate the heating element. It’s usually a long, curved metal tube near the bottom of the dishwasher. Take note of how it’s connected to the wiring harness, as you’ll need to replicate this setup when installing the new element.
Tips for Disassembly
Here are a few extra tips to make the process smoother:
- Take photos as you go. This will help you remember how everything fits together.
- Keep all screws and small parts in a safe place so you don’t lose them.
- Work slowly and methodically to avoid damaging any components.
Once you’ve got the old element exposed, you’re ready to move on to the next step.
Removing the Old Heating Element
Removing the old heating element is a straightforward process, but it requires a bit of patience. Start by disconnecting the wires from the element. You may need to use a screwdriver or pliers to loosen the connections.
Next, unscrew the mounting brackets that hold the element in place. Depending on your dishwasher model, there might be two or three screws holding it down. Once the screws are removed, gently pull the element out of the dishwasher.
Pro tip: If the element is stuck, don’t force it. Wiggle it gently or use a little lubricant to help it come loose.
Installing the New Heating Element
Now it’s time to install the new heating element. Follow these steps:
- Position the new element in the same location as the old one.
- Secure it with the mounting brackets and tighten the screws.
- Reconnect the wires to the element, making sure they’re snug but not too tight.
- Double-check all connections to ensure they’re secure.
Once the new element is installed, reassemble the dishwasher by reversing the steps you took to disassemble it. Don’t forget to reinstall the toe kick panel and any other parts you removed.
Checking Your Work
Before you test the dishwasher, take a moment to review your work. Make sure everything is back in place and that there are no loose wires or screws. This will help prevent any issues during the testing phase.
Testing Your Dishwasher
Now comes the moment of truth—testing your newly repaired dishwasher. Follow these steps:
- Plug the dishwasher back in and restore power at the circuit breaker.
- Run a full cycle with a small load of dishes to see how the new heating element performs.
- Check the dishes after the cycle is complete. They should be dry and free of water spots.
If everything works as expected, congratulations—you’ve successfully replaced your heating element! If you notice any issues, don’t worry—we’ll cover troubleshooting in the next section.
Troubleshooting Tips
Even with careful installation, sometimes things don’t go exactly as planned. Here are some common issues and how to fix them:
- Dishes Still Wet: Double-check the wiring connections to ensure they’re secure. Also, verify that the new element is compatible with your dishwasher model.
- Error Codes: Refer to your dishwasher’s manual to decode any error messages. This can help you pinpoint the problem.
- Leaking Water: If you notice water leaking from the heating element area, it could indicate a damaged seal or improper installation. Carefully inspect the area and make adjustments as needed.
Remember, troubleshooting is all about patience and persistence. If you’re still stuck, don’t hesitate to reach out to a professional for assistance.
Common Questions
Here are some frequently asked questions about replacing a heating element in a dishwasher:
How Long Does a Heating Element Last?
Most heating elements last between 5 and 10 years, depending on usage and maintenance. Regular cleaning and descaling can help extend their lifespan.
Can I Replace the Heating Element Myself?
Yes! With the right tools and a bit of patience, you can definitely replace the heating element yourself. Just be sure to follow safety guidelines and consult your dishwasher’s manual if needed.
How Much Does a Replacement Heating Element Cost?
Prices can vary depending on the brand and model of your dishwasher, but most replacement heating elements cost between $20 and $50. This is much cheaper than calling in a repair technician.
Kesimpulan
Replacing the heating element in your dishwasher might seem intimidating at first, but with this guide, you’ve got everything you need to tackle the job like a pro. Remember to prioritize safety, gather the right tools, and take your time during the process.
If you found this article helpful, we’d love to hear from you! Leave a comment below or share this guide with your friends who might be facing the same issue. And hey, if you’re looking for more DIY tips and tricks, be sure to check out our other articles on home repairs and maintenance.
Happy fixing, and may your dishes always come out dry and spotless!

