Free IoT Platform Raspberry Pi: Your Ultimate Guide To Building Smart Solutions
Hey there, tech enthusiasts and DIY wizards! If you're diving into the world of IoT (Internet of Things), you've probably heard about Raspberry Pi and its game-changing role in this space. Today, we’re talking about free IoT platforms for Raspberry Pi that can supercharge your projects without burning a hole in your pocket. Whether you're building a smart home system, automating your garden, or creating a weather station, this guide is your ticket to success!
Let's face it, IoT is no longer just a buzzword; it's a reality shaping our world. From connected devices to smart cities, the possibilities are endless. But where do you start? The Raspberry Pi, with its affordability and versatility, is a perfect entry point. Pairing it with the right free IoT platform can turn your wildest ideas into reality.
Now, before we dive deep into the nitty-gritty, let me assure you this isn't just another tech article. We're here to break down complex concepts into bite-sized pieces that even a beginner can digest. So, grab your favorite drink, sit back, and let’s explore the magical world of IoT on a budget!
Why Choose Raspberry Pi for IoT Projects?
Raspberry Pi has become a go-to device for makers and developers worldwide, and for good reason. Its compact size, low cost, and robust capabilities make it an ideal platform for IoT projects. But what exactly sets it apart?
First off, Raspberry Pi is packed with features that cater to IoT needs. It supports multiple programming languages, has GPIO pins for hardware interfacing, and boasts a strong community backing. Plus, it runs on various operating systems, giving you the flexibility to choose what works best for your project.
Another huge advantage is its compatibility with free IoT platforms. These platforms offer tools and services that simplify development, allowing you to focus more on innovation rather than infrastructure. Whether you're a seasoned pro or a hobbyist, Raspberry Pi provides the perfect foundation to bring your IoT ideas to life.
What Makes Raspberry Pi Stand Out in the IoT Space?
Here’s a quick rundown of why Raspberry Pi dominates the IoT landscape:
- Cost-Effective: Raspberry Pi models start at an affordable price point, making them accessible to everyone.
- Versatile: It supports a wide range of applications, from home automation to industrial solutions.
- Community Support: A vast online community means you'll never be short of tutorials, forums, and troubleshooting tips.
- Open Source: Its open-source nature encourages experimentation and customization.
So, if you're looking for a device that offers bang for your buck, Raspberry Pi is the way to go.
Top Free IoT Platforms Compatible with Raspberry Pi
Now that we’ve established why Raspberry Pi is a great choice for IoT, let’s talk about the free IoT platforms that pair seamlessly with it. These platforms not only reduce costs but also enhance functionality, making your projects smarter and more efficient.
1. Adafruit IO
Adafruit IO is a cloud-based IoT platform designed specifically for makers and hobbyists. It offers a user-friendly interface, real-time data visualization, and effortless integration with Raspberry Pi. You can set up dashboards, create rules, and automate tasks without writing a single line of code.
Key features include:
- Simple setup process
- Pre-built integrations
- Free tier for personal use
Adafruit IO is perfect for beginners who want to get their feet wet in IoT without dealing with complex configurations.
2. ThingsBoard
ThingsBoard is an open-source IoT platform that supports both cloud and on-premise deployments. It offers advanced features like data analytics, device management, and customizable dashboards. With its powerful API, you can extend its capabilities to fit your specific needs.
Why choose ThingsBoard?
- Scalable architecture
- Rich set of plugins
- Active developer community
If you're working on large-scale projects, ThingsBoard is definitely worth considering.
Setting Up Your Raspberry Pi for IoT
Before you can start leveraging these free IoT platforms, you need to set up your Raspberry Pi correctly. Here's a step-by-step guide to help you get started:
Step 1: Install the Operating System
The first step is installing an OS on your Raspberry Pi. Raspbian, now known as Raspberry Pi OS, is the official operating system and a great choice for most projects. You can download the image from the official website and flash it onto an SD card using tools like BalenaEtcher.
Step 2: Configure Wi-Fi and SSH
Once the OS is installed, configure Wi-Fi and enable SSH for remote access. This can be done by editing the config files on the SD card before inserting it into the Raspberry Pi. Alternatively, you can connect a keyboard and monitor to set everything up directly.
Step 3: Update and Upgrade
After booting up, run the following commands to ensure your system is up-to-date:
sudo apt update && sudo apt upgrade
This step ensures you have the latest software packages, reducing the risk of vulnerabilities.
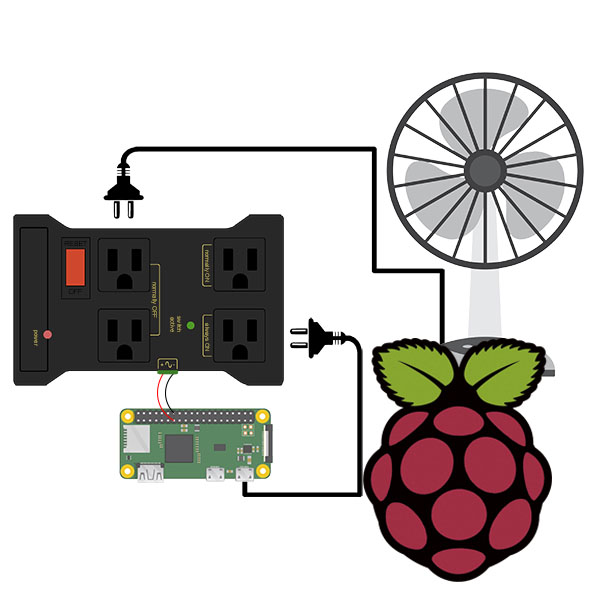
Building Your First IoT Project
With your Raspberry Pi set up and connected to an IoT platform, it's time to build your first project. Let's take a look at a simple example: creating a temperature monitoring system.
Materials Needed
- Raspberry Pi (any model with GPIO pins)
- DS18B20 temperature sensor
- Breadboard and jumper wires
Follow these steps to assemble your circuit and write the necessary code. Once completed, you can send the temperature data to your chosen IoT platform for visualization and analysis.
Data Security in IoT Projects
As exciting as IoT is, security should always be a top priority. With devices constantly communicating over networks, they become potential targets for cyberattacks. Here are some tips to keep your projects secure:
- Use strong passwords and encryption
- Regularly update firmware and software
- Limit access to critical systems
Remember, a single vulnerability can compromise your entire network, so stay vigilant!
Best Practices for IoT Development
Developing IoT projects requires a strategic approach. Here are some best practices to follow:
1. Plan Ahead
Define your project goals and requirements clearly. This will help you choose the right hardware, software, and platform.
2. Test Thoroughly
Conduct rigorous testing at every stage to identify and fix issues early on.
3. Document Everything
Keep detailed records of your setup, configurations, and code. This will save you time and effort in the long run.
Future Trends in IoT and Raspberry Pi
The IoT landscape is evolving rapidly, and Raspberry Pi continues to play a pivotal role in this transformation. Some emerging trends to watch out for include:
- Edge computing
- AI integration
- 5G connectivity
These advancements promise to take IoT to new heights, offering even more possibilities for innovation.
Conclusion
And there you have it, folks! A comprehensive guide to free IoT platforms for Raspberry Pi. From setting up your device to building your first project, we've covered everything you need to know to get started. Remember, the key to success in IoT lies in creativity and persistence.
So, what are you waiting for? Dive into the world of IoT and let your imagination run wild. Don't forget to share your experiences and creations with the community. Who knows, you might just inspire the next big thing in IoT!
Call to Action: Got questions or feedback? Drop a comment below or join the conversation on social media. And if you found this article helpful, consider sharing it with your fellow tech enthusiasts. Together, let's make the IoT ecosystem stronger and more inclusive!
Table of Contents
- Why Choose Raspberry Pi for IoT Projects?
- Top Free IoT Platforms Compatible with Raspberry Pi
- Setting Up Your Raspberry Pi for IoT
- Building Your First IoT Project
- Data Security in IoT Projects
- Best Practices for IoT Development
- Future Trends in IoT and Raspberry Pi
- Conclusion


, you've probably heard about Raspberry Pi and its game-)